
1. Prepare the structures in Business Central
First, the target structures are created or adjusted in Business Central. These tables will later hold the content from the old NAV system – including new fields or adjusted tables that are required for the new system.
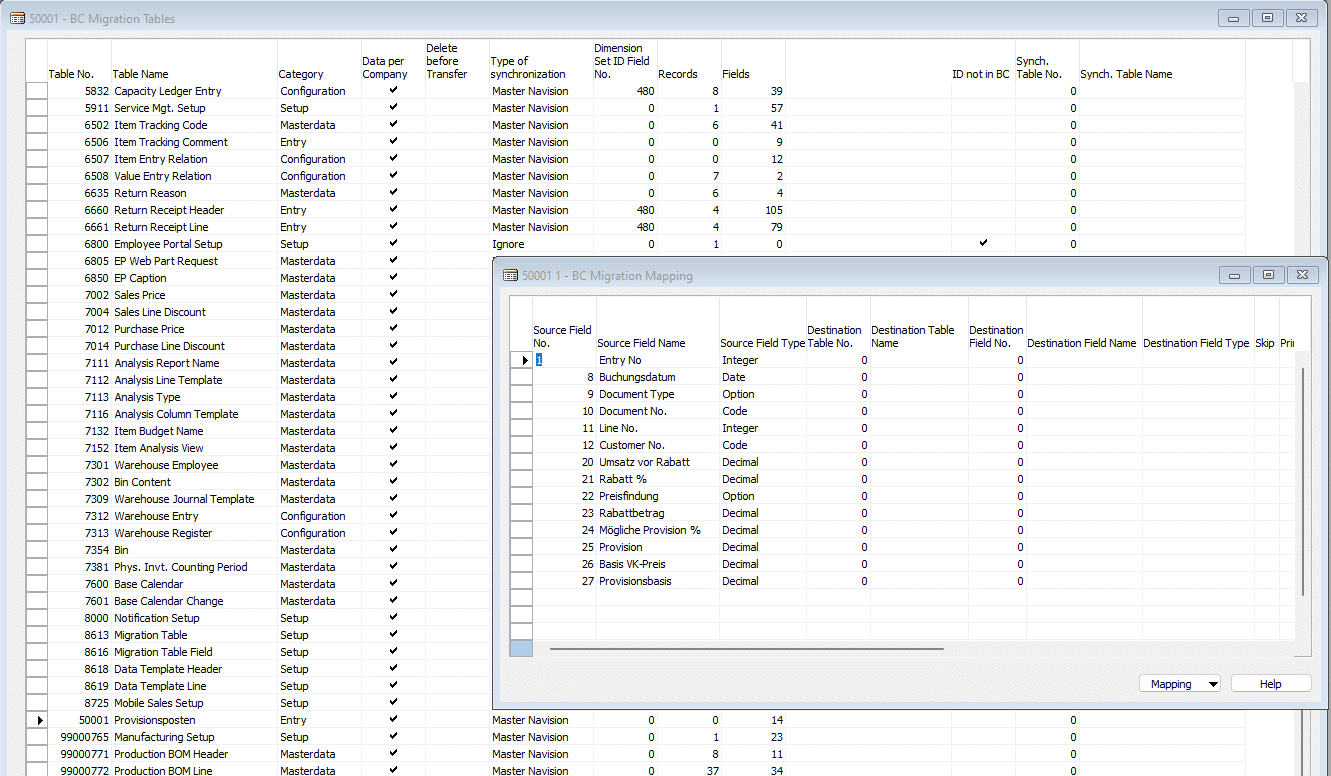
Example structure in NAV
Excerpt Provisionsposten.Table.al
namespace Customer.Provision;

using Microsoft.Sales.Setup;
using Microsoft.Sales.Document;
using Microsoft.Inventory.Item;
using Microsoft.Sales.Customer;

table 70103 "Provisionsposten IOI"
{

    //DrillDownFormID = Form50006;
    //LookupFormID = Form50006;

    fields
    {
        field(1; "Entry No."; Integer)
        {
            Caption = 'lfd. Nr.';
        }
        field(8; Buchungsdatum; Date)
        {
        }
        field(9; "Document Type"; Option)
        {
            Caption = 'Document Type';
            OptionCaption = 'Quote,Order,Invoice,Credit Memo,Blanket Order,Return Order';
            OptionMembers = Quote,"Order",Invoice,"Credit Memo","Blanket Order","Return Order";
        }
        field(10; "Document No."; Code[20])
        {
            Caption = 'Document No.';
        }
2. Read structures into mapping structures
These BC structures are then read into the mapping system. There they serve as the basis for assigning the source tables and fields to the target tables and fields.

3. Write the mapping structures back to NAV and configure the assignment
The structures that have been read in are then transferred to NAV.
DataMigratePro -t loadconfigurationThat is where the relationships are configured: which table from NAV corresponds to which table in BC? Which fields are to be transferred, and which are keys?
4. Start the data transfer to BC
With this complete mapping, the transfer of the content can begin. The data from NAV is transferred automatically into the new structures according to the defined relationships and mappings.
DataMigratePro -t putdata -s 50001 -d 701035. Alternative procedure
The transfer can also be configured directly through mapping files. Here is an extract for the example above
{
    "Provisionsposten": [
        {
            "FieldNo": 1,
            "FieldName": "Entry No.",
            "MappedName": "Entry No_",
            "Validate": true
        },
        {
            "FieldNo": 8,
            "FieldName": "Buchungsdatum",
            "MappedName": "Buchungsdatum",
            "Validate": true
        },
        {
            "FieldNo": 9,
            "FieldName": "Document Type",
            "MappedName": "Document Type",
            "Validate": true
        },
        {
            "FieldNo": 10,
            "FieldName": "Document No.",
            "MappedName": "Document No_",
            "Validate": true
        },
        .
        .
        .
   ],
    "ValidateOnInsert": true,
    "ValidateOnModify": true,
    "ValidateOnDelete": true
}
With this Json, steps 1. – 4. are not necessary. The data is then transferred with the following command:
DataMigratePro -t putdata -s 50001 -d 70103 -m path/to/mapping/file.json
Status message during the transfer

Sascha Marquardt
Responsible for the partner programme, the licensing business and commercial project delivery.